Survey Layout Guide
About Survey Layout
The layout settings in Survey Creator are essential for creating user-friendly and visually balanced surveys. These settings affect how questions are displayed and organized, helping ensure that your survey is easy to follow and interact with. Careful layout choices improve readability, reduce the perceived complexity of the survey, and create a more appealing and professional-looking form.
How to Display a Single Question per Page (Card View)
The Show single question per page option, also known as Card View, helps break down surveys with multiple questions into manageable sections, placing each question on its own page. This option is particularly useful for longer surveys or when you need to focus user attention on one question at a time.
To enable the Card view, follow these steps:
- At the top of the Property Grid, select Survey to switch to the survey-level settings.
- Under Navigation, locate the Survey layout setting.
- Select the Show single question per page option.
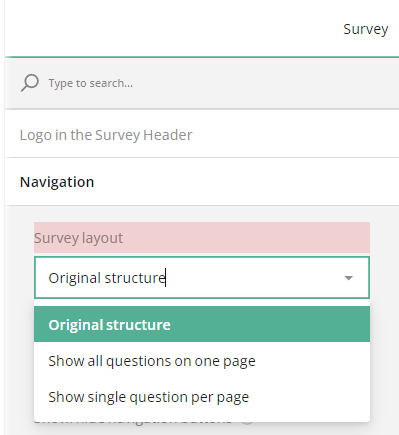
Other survey layout options include:
Show all questions on a single page
Displays the entire survey on one page. This is best suited for shorter surveys where all questions are easily visible without overwhelming the user with scrolling.Original structure
Keeps the survey in its initially designed layout, preserving the original number of pages and the specific placement of questions on each page.
How to Change the Question Title Location
For forms with multiple questions and shorter titles, adjusting the title location can help make the survey more compact. You can configure the question title settings at four levels: for the entire form, for an individual page, for a specific panel, or for a single question.
To set question title location for all questions within a form, follow these steps:
- At the top of the Property Grid, select Survey to switch to the survey-level settings.
- Under Question Settings, locate the Question title alignment setting.
- Select between available options:
- Top (default) - Question title appears above the input field.
- Bottom - Question title appears below the input field.
- Left - Question title is displayed to the left of the input field.
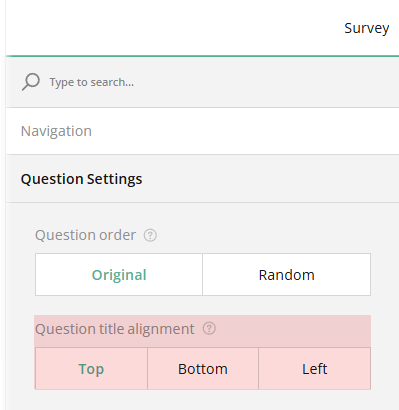
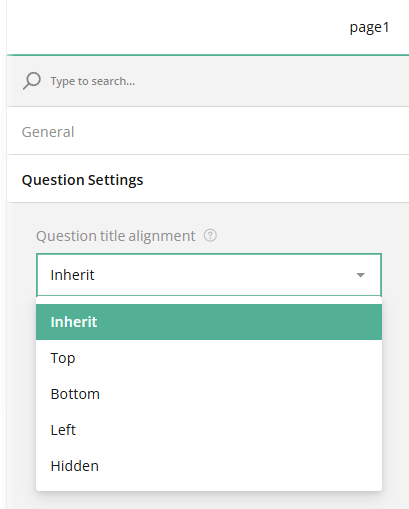
To customize the question title location for questions within a specific page or panel, select the desired page or panel and follow the same steps in the example above starting from step 2. Selecting the Inherit option on step 3 will apply the alignment setting of the parent element, whether it's a nesting panel or the page which the question belongs to.
If you set Question title alignment to Left, it's recommended to specify a consistent width for question titles on each page or panel to keep the layout tidy. Please refer to the following guide for more information: How to Vertically Align Input Fields in a Form
You can also choose to place question titles at the Bottom of the input field, which can be helpful for focusing attention on choice options or when you want to show validation messages at the bottom.

How to Change the Question Description Location
By default, question descriptions are positioned beneath question titles to provide context or instructions. For this reason, the description alignment setting has only two options:
Under the question title
This option places the description directly beneath the question title, wherever the title is positioned.Under the input field
This option always places the question description beneath the input field, regardless of the position of the question title.
The Under the question title option works well for descriptions of any length when the title is positioned at the top or bottom of the question box. However, for left-aligned titles, long descriptions may take up more space than expected, depending on the title width setting. If a width is specified, the description may require additional vertical space. If no width is set, it may extend horizontally. See the examples below for illustration.


To avoid situations like those illustrated above, place descriptions under input fields if you align question titles to the left:

To set question description location for all questions within a form, follow these steps:
- At the top of the Property Grid, select Survey to switch to the survey-level settings.
- Under Question Settings, locate the Question description alignment setting.
- Select between the available options.
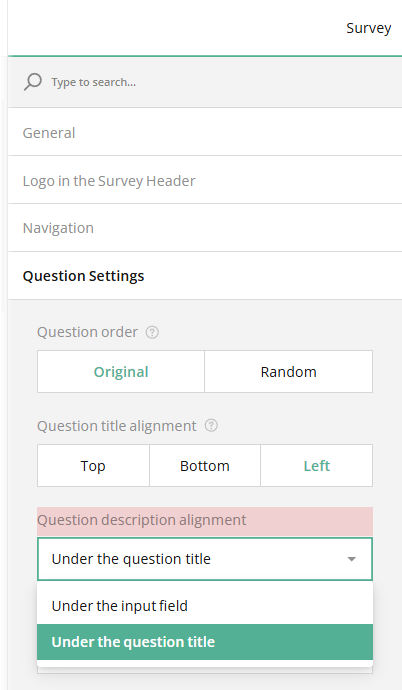
To customize the question description location for questions within a specific page or panel, select the desired page or panel and follow the same steps in the example above starting from step 2.
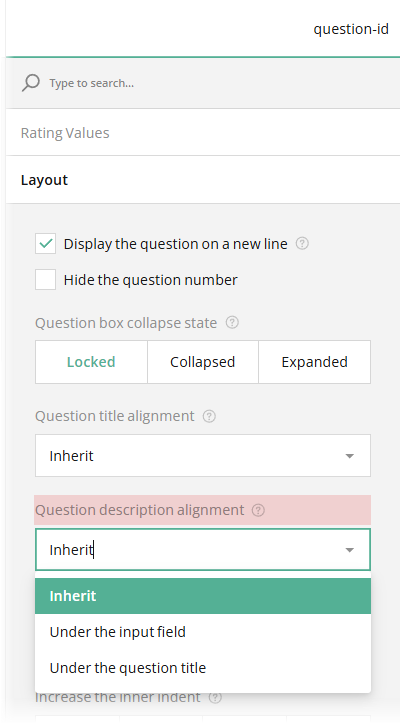
If you wish to set a question description location for an individual question, follow these steps:
- Select the question to modify on the design surface or from the survey tree using the question name (ID).
- Under Layout, locate the Question description alignment property.
- Select from the available options. Selecting Inherit will apply the alignment setting of the parent element, whether it's a nesting panel or the page which the question belongs to.
How to Collapse/Expand Panels
A panel (or a section) is a form element that allows you to group several questions together and modify their settings all at once. Collapsed panels can help improve navigation and reduce clutter, especially in surveys with multiple sections.
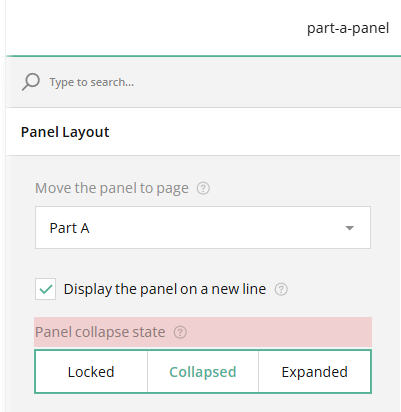
To set a collapse state for a panel, do the following:
- Select the panel you'd like to modify.
- Under Panel layout, find the Panel collapse state setting.
- Select from the following options:
- Expanded - Panel is fully displayed but can be collapsed.
- Collapsed - Panel shows only the title and description initially and can be expanded.
- Locked - Panel is fully displayed and cannot be collapsed.
How to Collapse/Expand Question Boxes
A question box is the area that includes the question title, input field, description, validation errors, and more. Collapsed question boxes can be useful for forms with long or complex questions, as they allow users to expand and focus on each question individually.
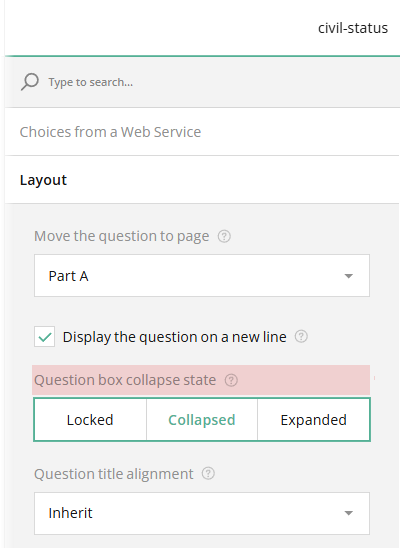
To set a collapse state for a question box, follow these steps:
- Select the question you want to modify.
- Under Layout, locate the Question box collapse state setting.
- Select from the following options:
- Expanded - Question box is fully displayed but can be collapsed.
- Collapsed - Question box displays only the title and description initially and can be expanded.
- Locked - Question box is fully displayed and cannot be collapsed.
Send feedback to the SurveyJS team
Need help? Visit our support page