Page Management in Complex Forms with Survey Creator v2.0
Survey Creator v2.0 introduced several game-changing features for users working with long, multi-page forms. Enhancements like smart page collapse, dedicated collapse/expand controls, and an updated page menu make handling complex surveys more efficient and enjoyable. In addition to these new capabilities, this blog post will also cover other essential page settings that contribute to a more intuitive form-building experience.
The videos in this blog were recorded with the accordion view enabled for the Property Grid. Refer to the Accordion View if you want to enable this view for Survey Creator in your application.
Reorder Pages
Survey Creator v2.0 offers multiple ways to reorder pages within a form. Users can make changes via the Property Grid settings panel or directly on the design surface by dragging a page to a new location.
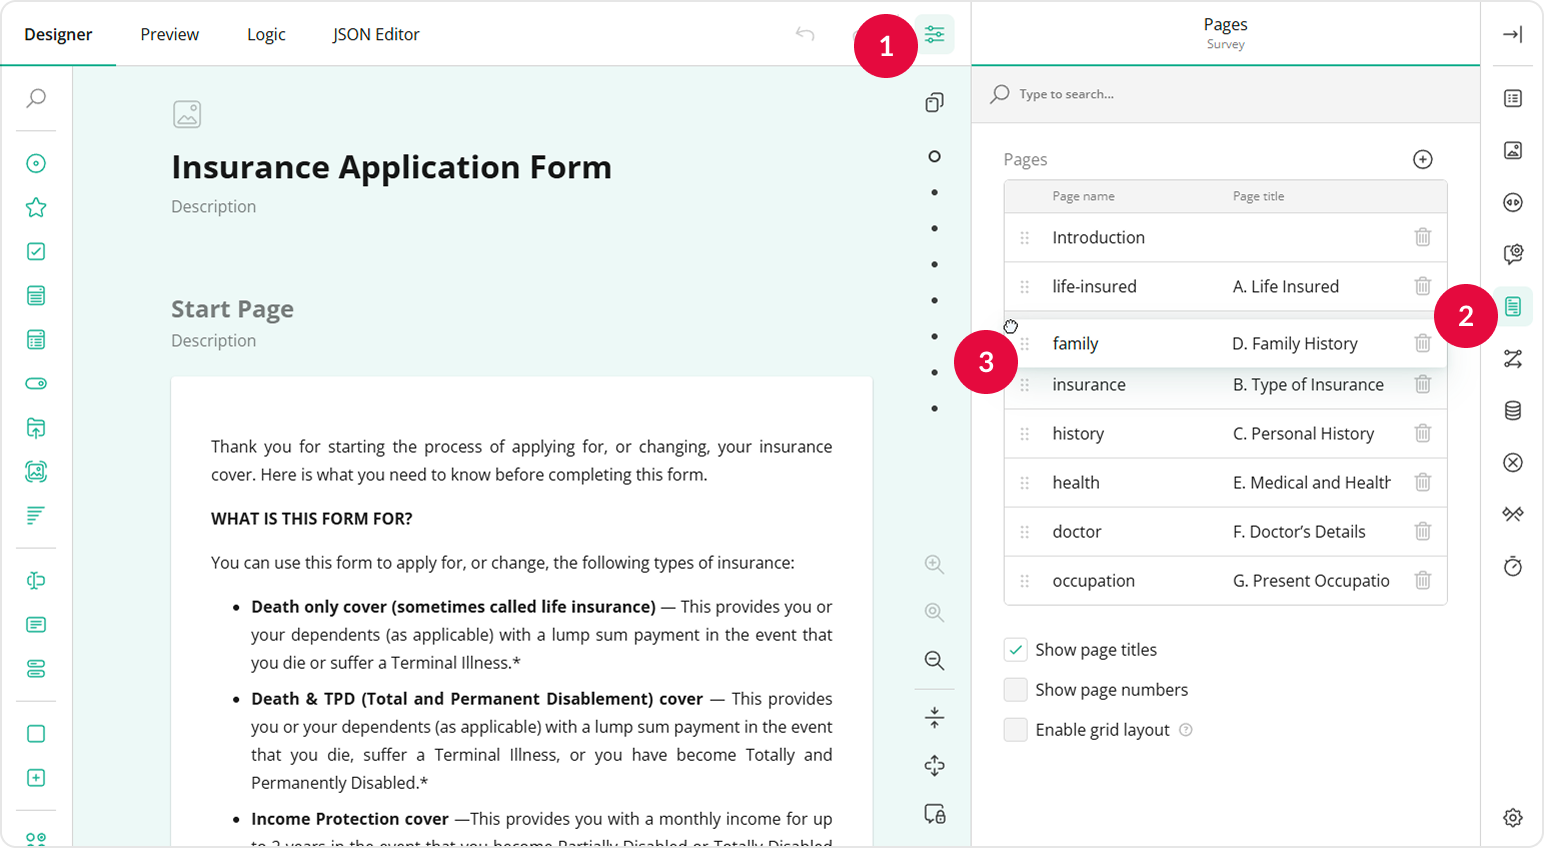
Change Page Order Using Page Settings
This method of repositioning pages, retained from previous Survey Creator versions, allows users to modify page order using the survey-level settings:
- Switch to survey-level settings using the survey tree menu in the header of the Property Grid or by clicking the Survey Settings button in the tab bar.
- Select the Pages category in the Property Grid and locate the Pages table there.
- Click and hold the drag handle of the page you want to move.
- Drag the page to its new position in the page list.
Drag Pages to Reposition
Survey Creator v2.0 introduced Smart Page Collapse feature that enables users to reorganize pages directly on the design surface. When a user starts dragging a page, other pages automatically collapse, providing a clearer overview of the survey structure. This feature significantly improves usability, especially in larger surveys with multiple sections.
Watch Video
For a more streamlined experience, users can collapse pages before repositioning them. In shorter surveys, individual collapse buttons may be sufficient.
For longer surveys, collapsing all pages at once enables smoother navigation.
Watch Video
Locate and Access Pages
Regardless of survey length, Survey Creator v2.0 makes finding and accessing specific pages effortless. Alongside the all-in-one survey tree menu, users can take advantage of the dedicated page navigator, which consists of two main parts:
Page indicators
A vertical list of small dot markers representing pages. When a page is selected, its corresponding indicator is highlighted. Users can hover over these indicators to view page IDs and click to navigate directly to a page.Searchable page list
The top section of the page navigator includes a button that reveals a list of all pages with a built-in search bar. Users can click a page name on this list to navigate to that page. For long surveys, a scroll bar appears allowing users to quickly find specific pages.
Watch Video
Add a New Page
A new page is automatically created when users place a new element to the area at the end of the form. For adding a page mid-form, there are two options. You can place a new element at the end of the form, thus creating a new page that you can then drag to the desired position. Another option is to add a new page using the Property Grid, as follows:
- Switch to survey-level settings.
- Select the Pages category and locate the page list in the form of a table.
- Click the Plus icon to add a new page to the bottom.
- Scroll down if required and drag the new page to its desired location.
- Specify a name for the page to make it easier to locate through the survey tree or page navigator.
Watch Video
Number Pages
Pages are unnumbered by default, but users can enable numbering at any time as follows:
- Switch to survey-level settings.
- Navigate to the Pages category.
- Locate and enable the Show page numbers option.
Watch Video
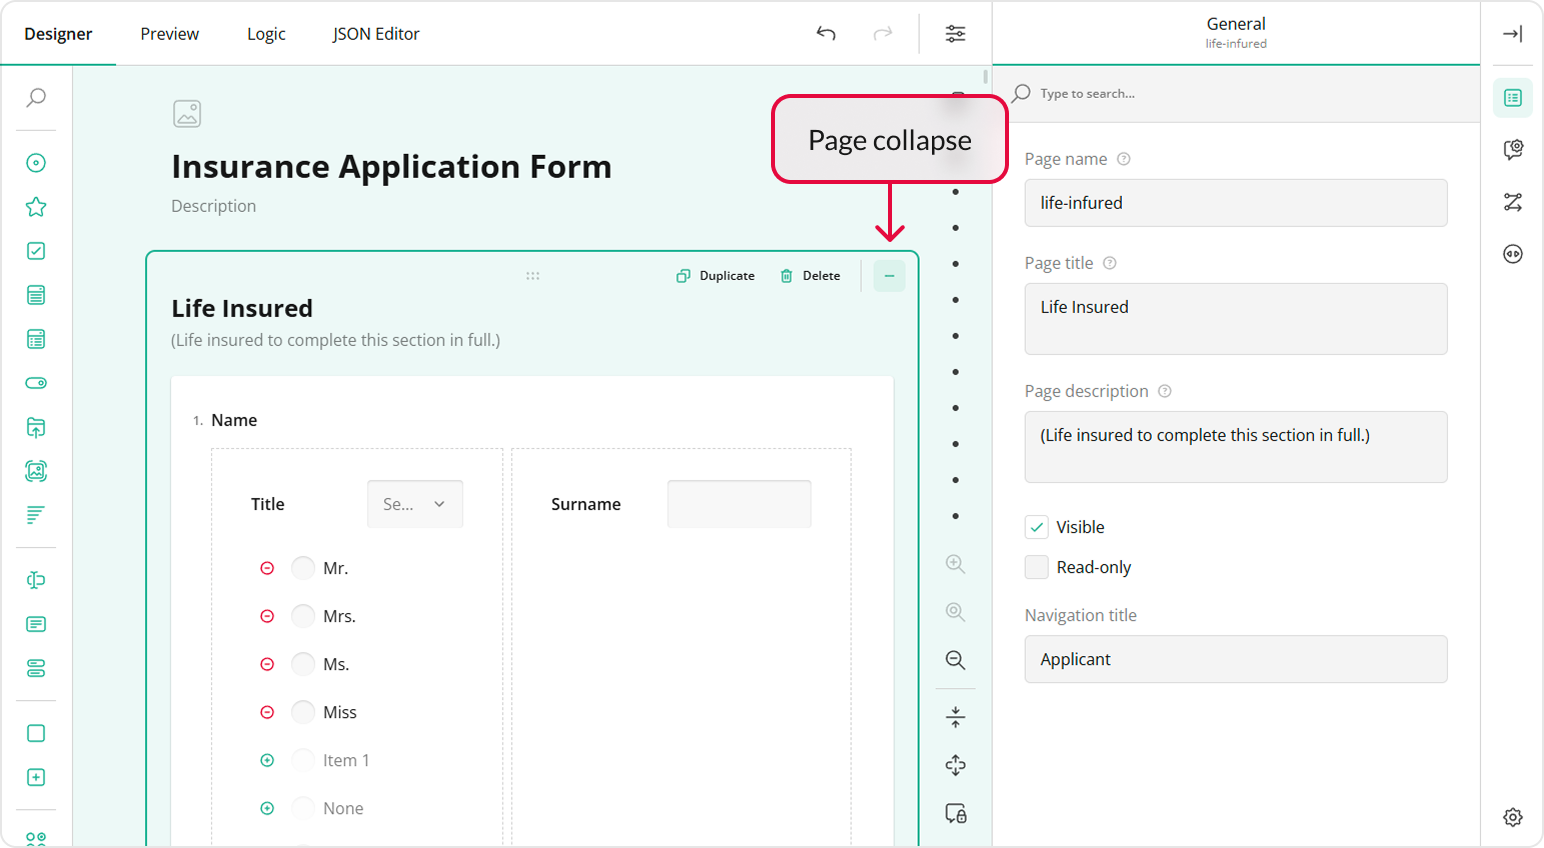
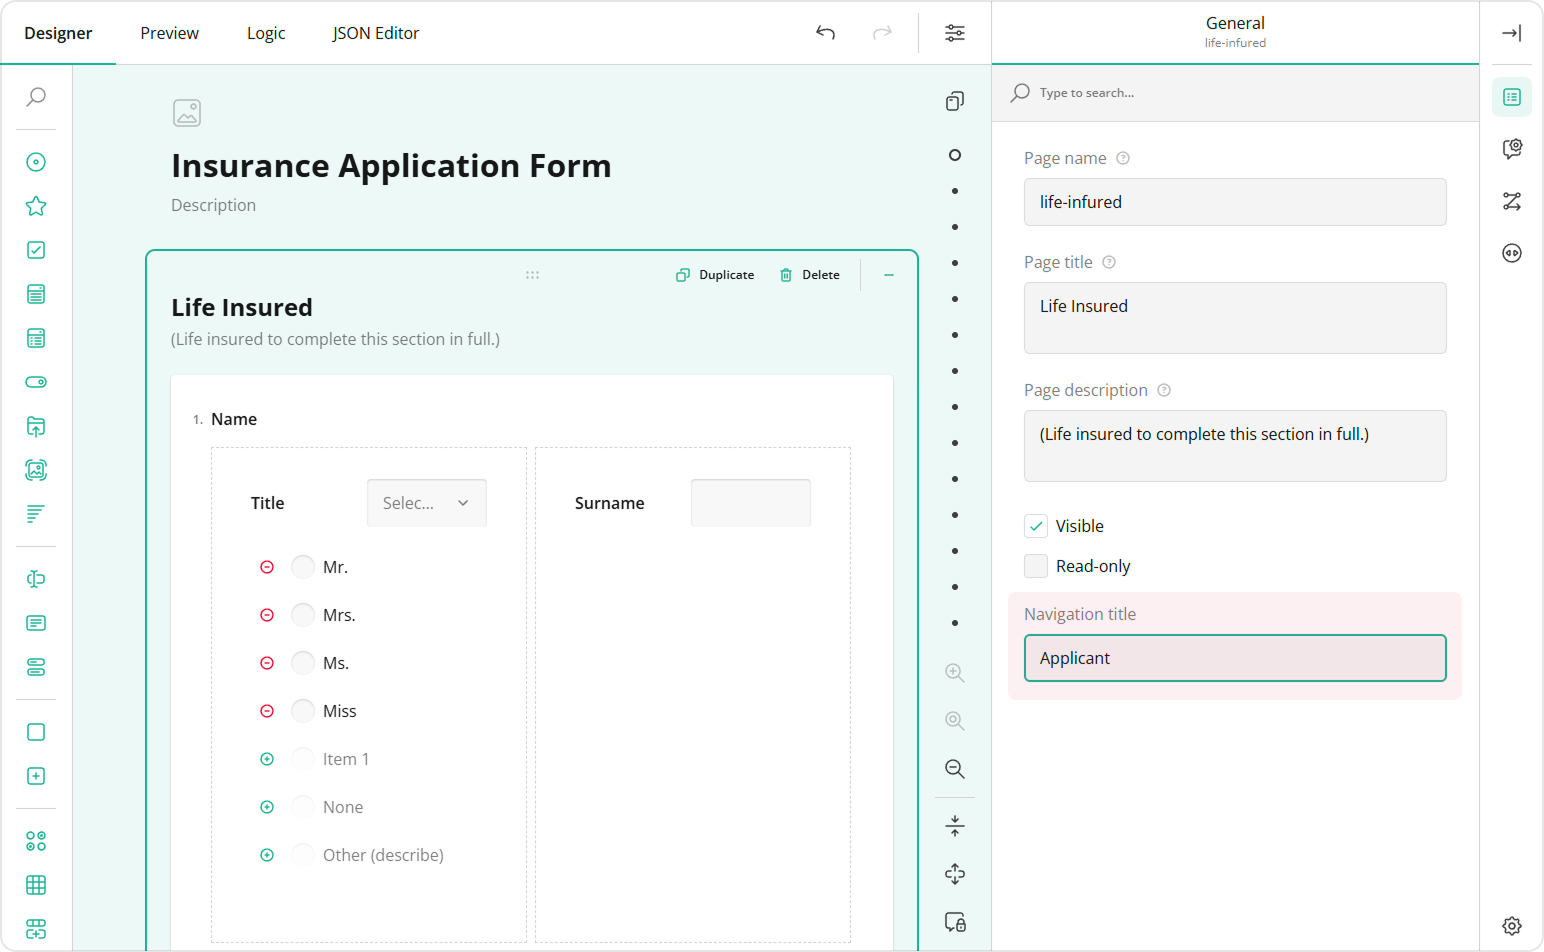
Add Navigation Titles
Navigation titles serve as captions for navigation buttons in the Table of Contents (TOC) and Progress Bar. These titles are set individually for each page. When a navigation title is not specified, the page's title (if available) or name is used instead.
Navigation Title in the TOC
To specify a navigation title for a page, follow these steps:
Select the page you want to modify.
Navigate to the General category and locate the Navigation title property.
Enter the text you want to use as a navigation title for the selected page.
Switch to survey-level settings.
Under the Navigation category, enable the Show table of contents (TOC) property.
Optionally, align the TOC to the left or right of the form using the TOC alignment property.
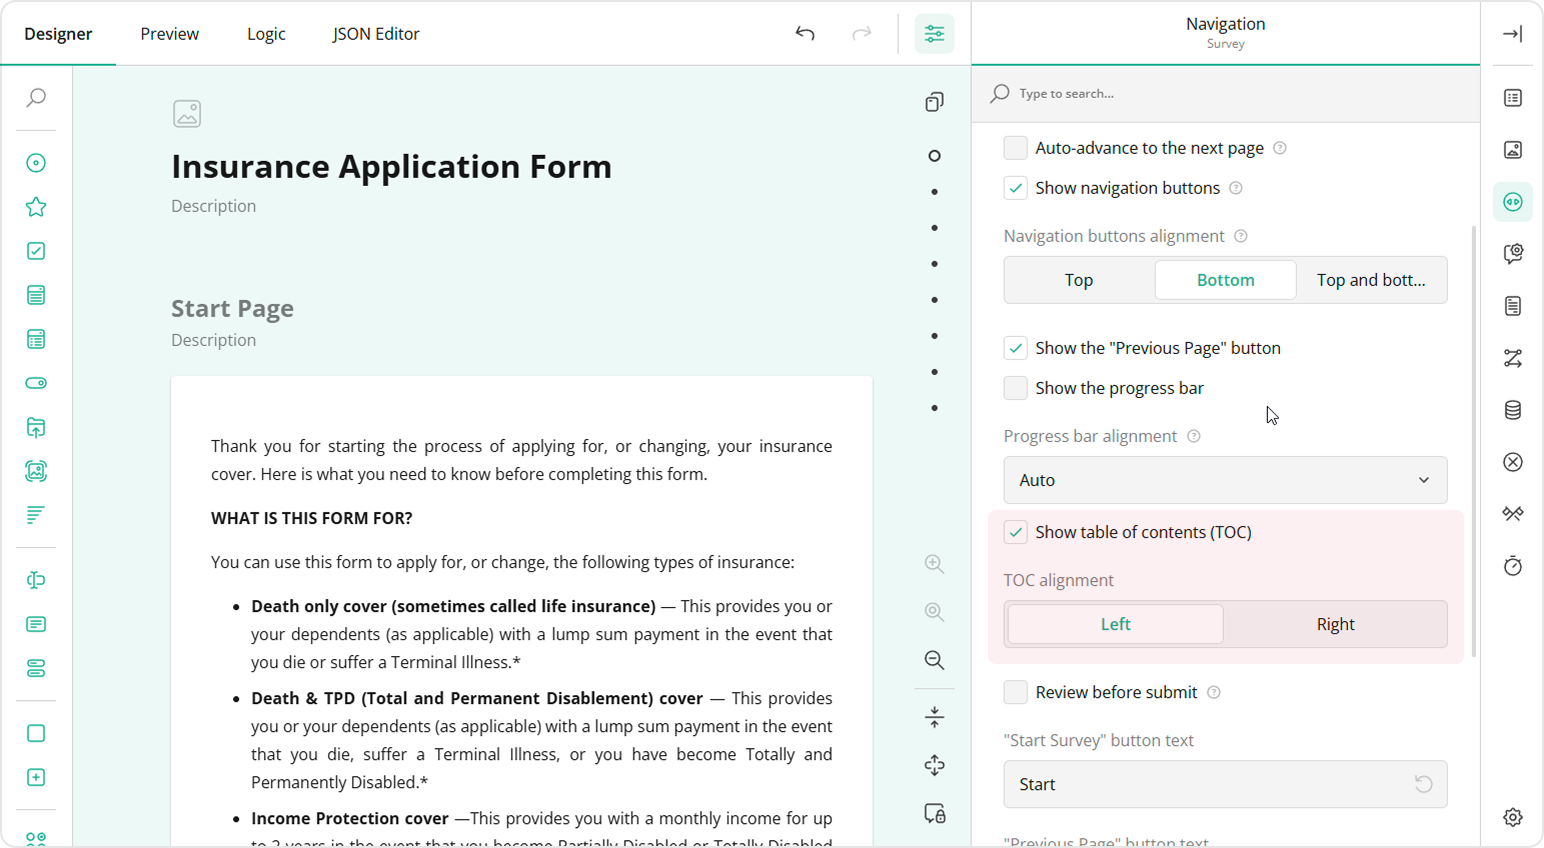
Once configured, the specified navigation title will appear in the TOC as shown below.

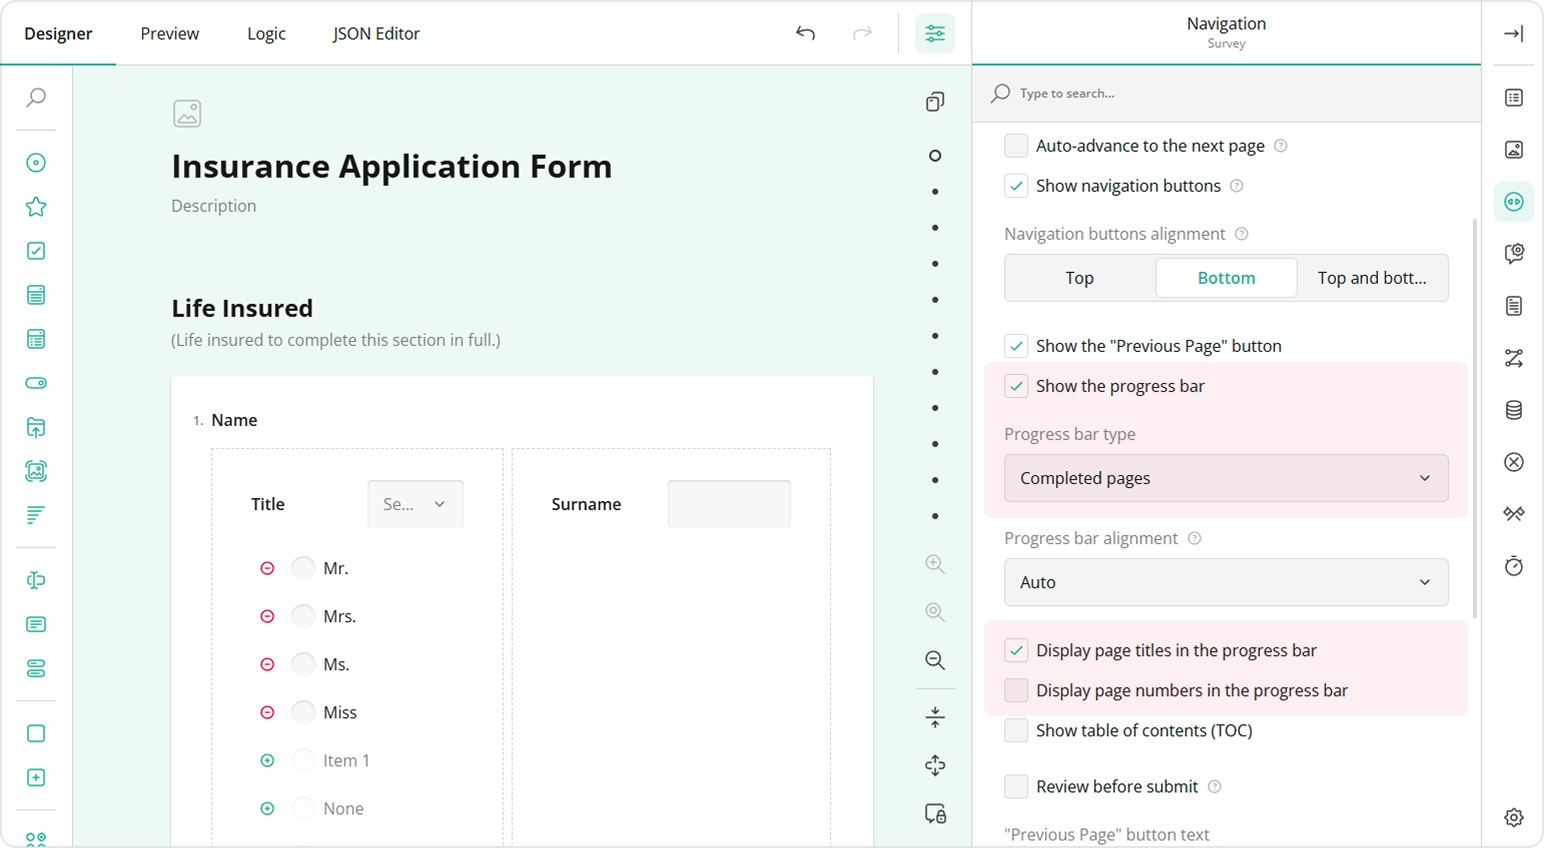
Navigation Title in the Progress Bar
To display navigation titles as clickable page identifiers in the progress bar, follow the steps below:
Assign navigation titles to pages as described in steps 1-3 above.
Switch to survey-level settings in the Property Grid.
Under the Navigation category, enable the Show the progress bar property.
Set Progress bar type to Completed pages.
Enable the Display page titles in the progress bar property.
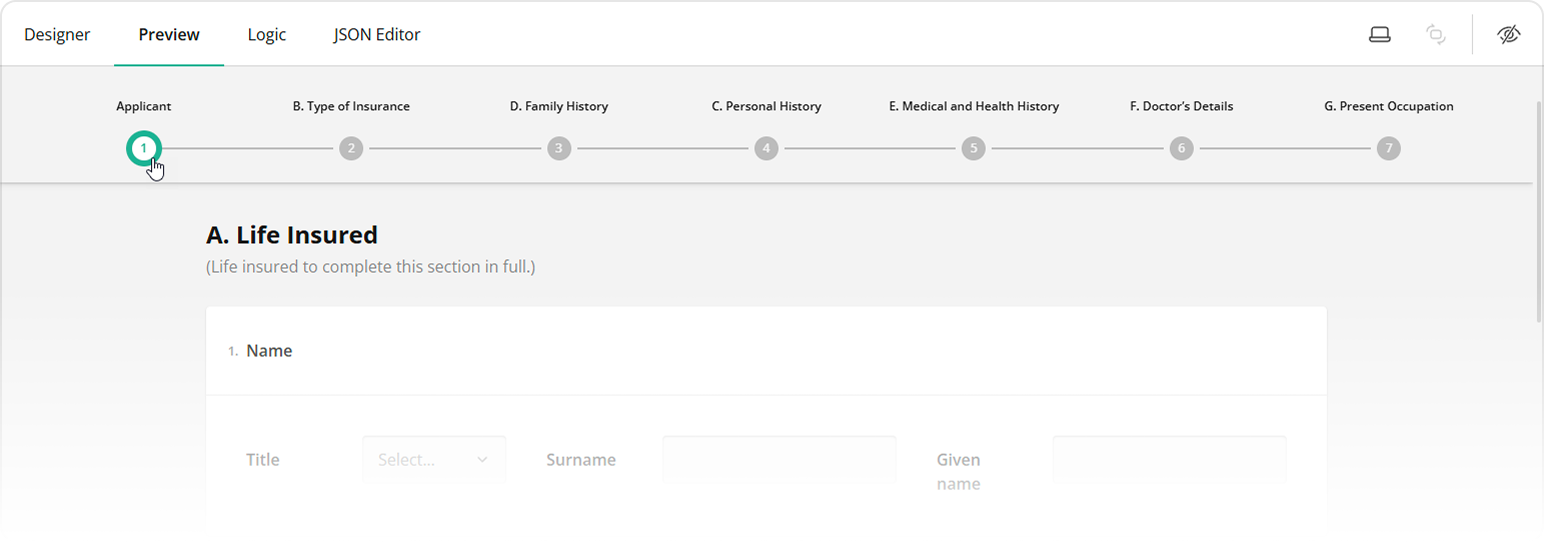
As a result, the progress bar with navigation titles will look as follows:
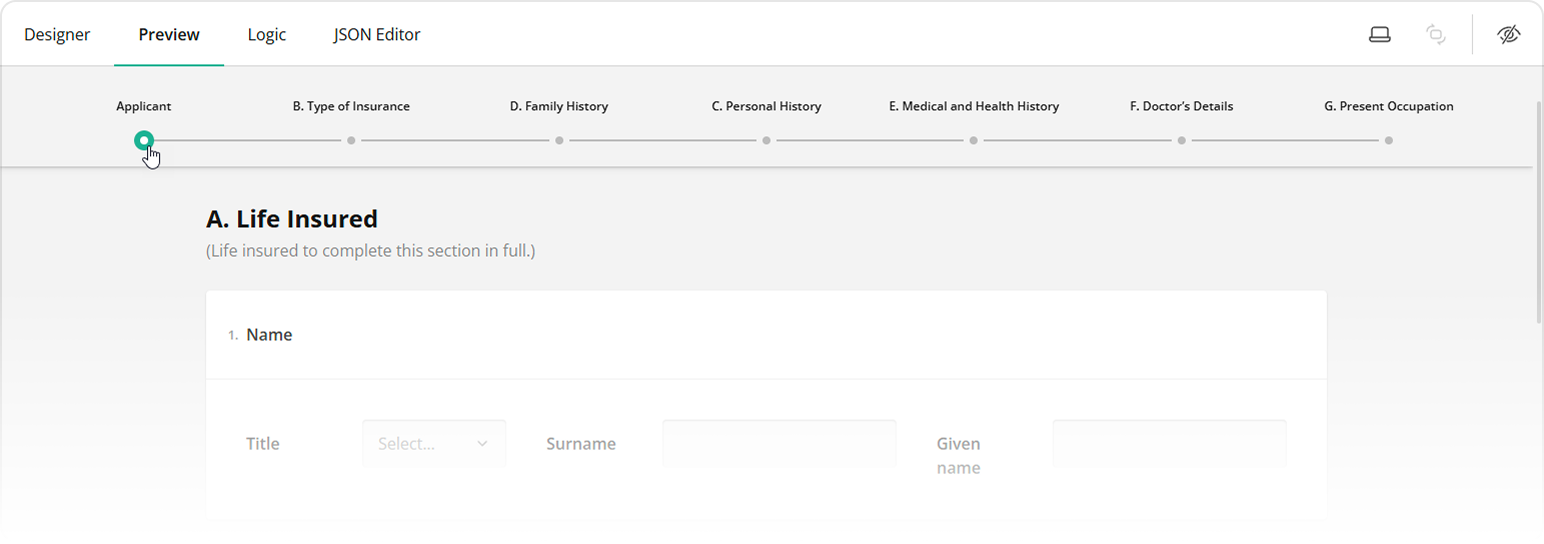
Additionally, users can enable the Display page numbers in the progress bar property to enhance navigation clarity.
Conclusion
With these powerful page management features, Survey Creator v2.0 makes creating and organizing long, multi-page forms more seamless than ever. Whether you're reordering pages, locating specific sections, or customizing navigation, these options enhance efficiency and usability, ensuring a smooth form-building experience.