Let Your Users Add Custom Options to Dropdowns
Allowing respondents to enter custom values is an essential feature for any dropdown question. Whether you're collecting job titles in a hiring form, asking patients to specify their next of kin, or letting students choose their academic major, users often want the flexibility to type in an option that isn't on your list. SurveyJS makes this easy.
The videos in this blog were recorded with the accordion view enabled for the Property Grid. Refer to the Accordion View if you want to enable this view for Survey Creator in your application.
Watch Video
Supported Questions
Survey Creator supports custom items in Dropdown and Tag Box questions. These question types differ slightly:
Dropdown
A single-select control in which users pick one option from the list.Tag Box (Multi-Select Dropdown)
A multi-select variant that lets users choose or type multiple items. It's perfect when you want to let users enter several tags or labels.
How to Enable Custom Values in a Dropdown Question
By default, the ability to type custom values is disabled. To allow respondents to manually enter their own value, follow these steps:
- Select the Dropdown or Multi-Select Dropdown question you want to modify, either directly on the design surface or from the survey tree menu in the Property Grid header.
- Under the Choice Options category, locate the Choices table.
- Add your predefined choices.
- Locate and enable the Allow custom choices property.
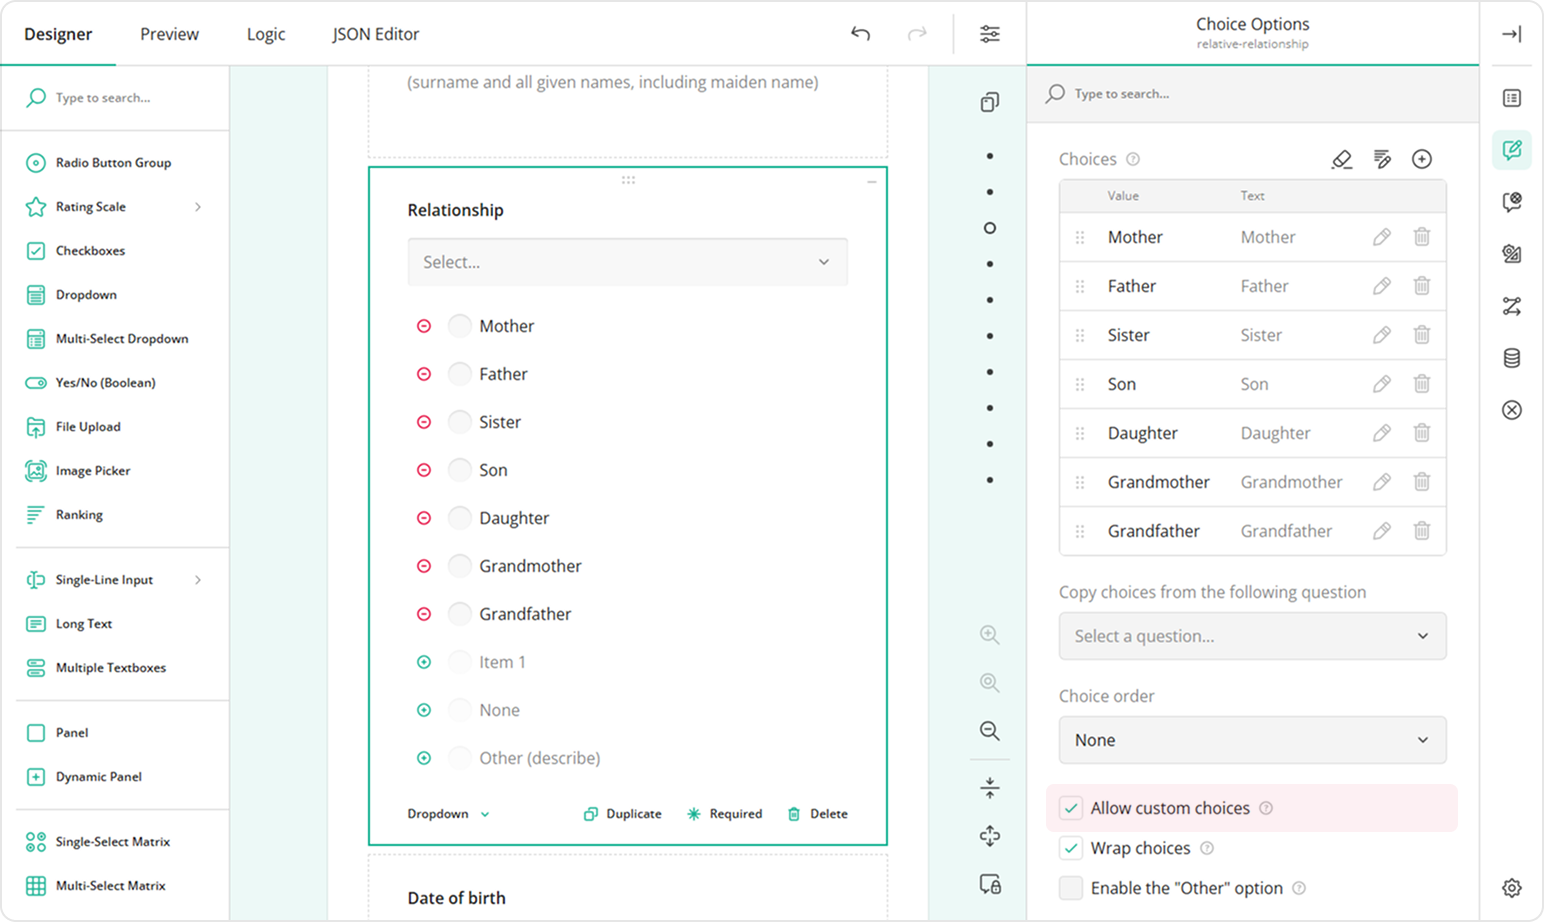
Once the custom choices feature is enabled, your dropdown question becomes much more flexible. Respondents can simply click into the dropdown and start typing to check if their desired option is available. If it's not, a "Create 'X' item" option will appear. Clicking it will save the entered value as a new choice.

By default, the custom item will appear at the top of the list. You'll learn how to change the order of items from the next part of this blog post.
How to Order Choices in a Dropdown Question
You can control the order of options in a dropdown question—even with custom options. This will make it easier for users to locate added or existing items on the list. If your choices are configured manually (not pulled from a web service), follow these steps to set the order:
- Repeat steps 1–3 from the instructions above.
- Locate the Choice order property.
- Set it to either Ascending or Descending.
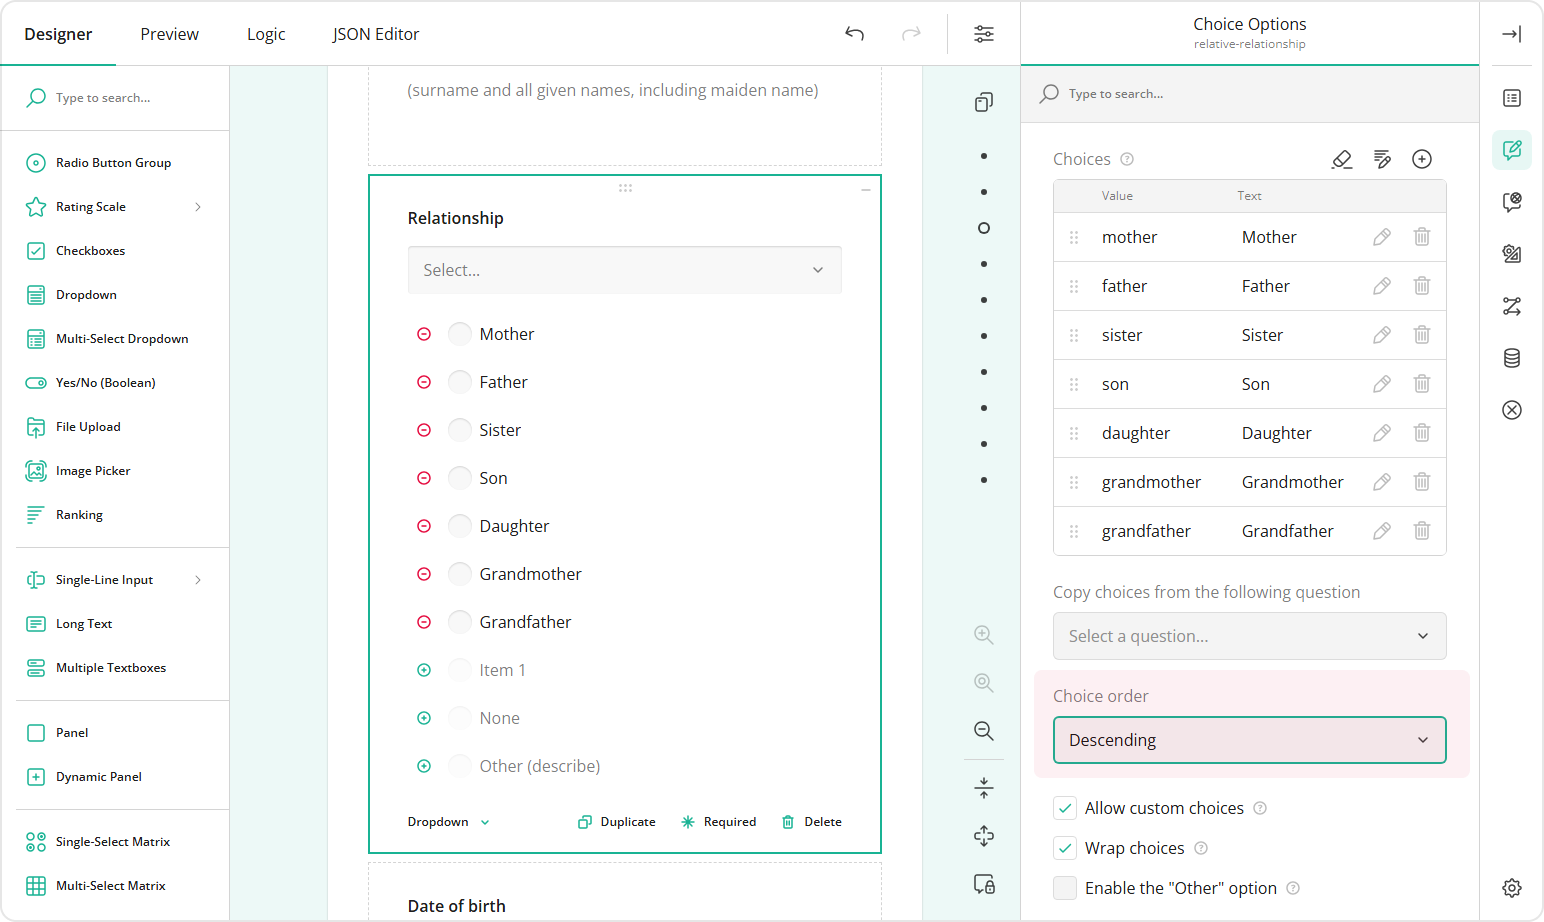
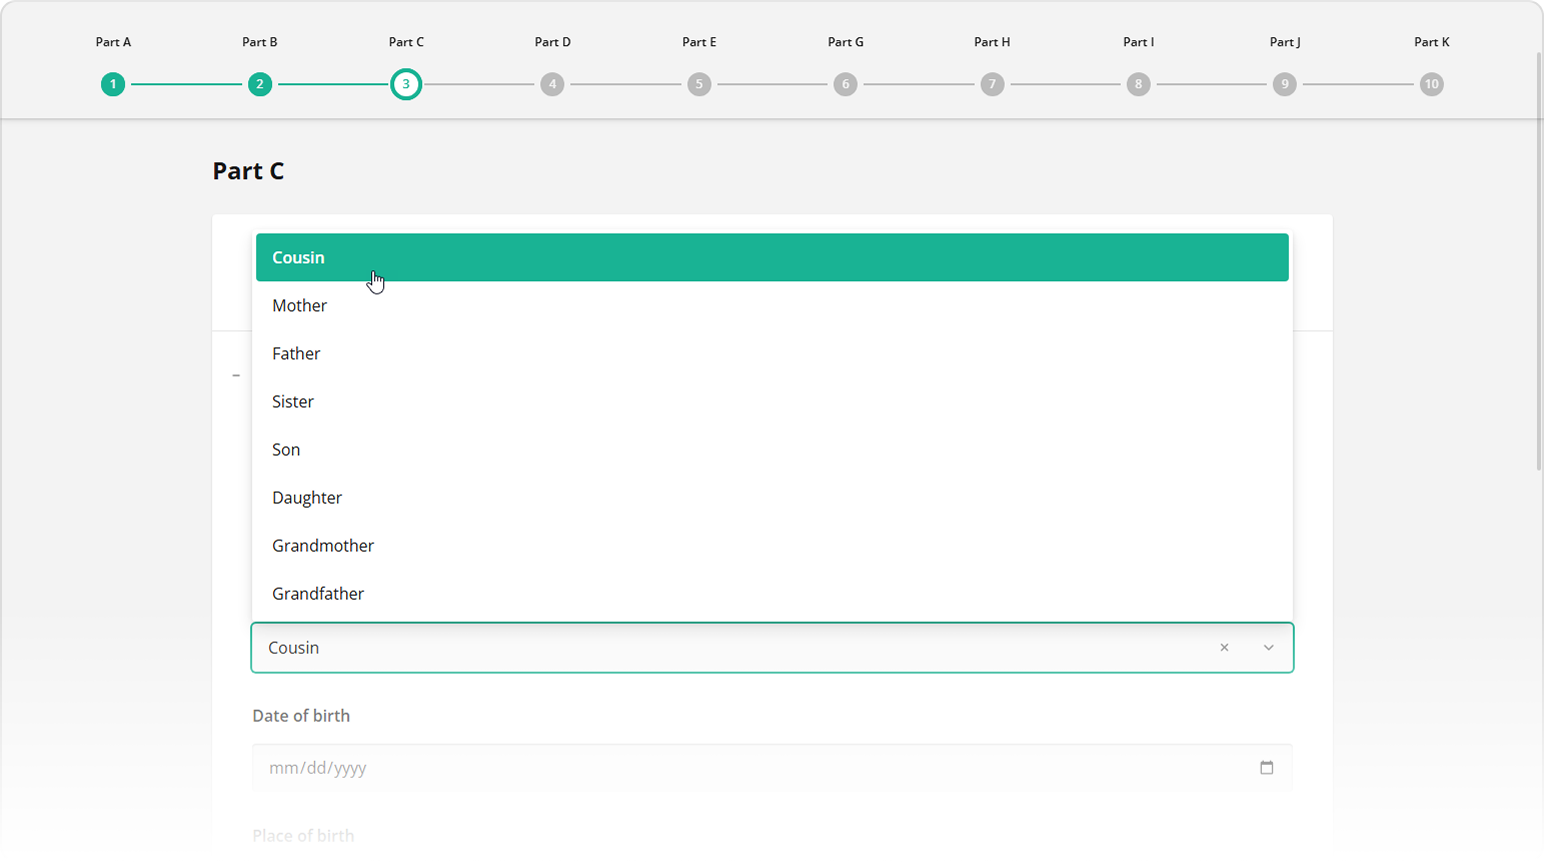
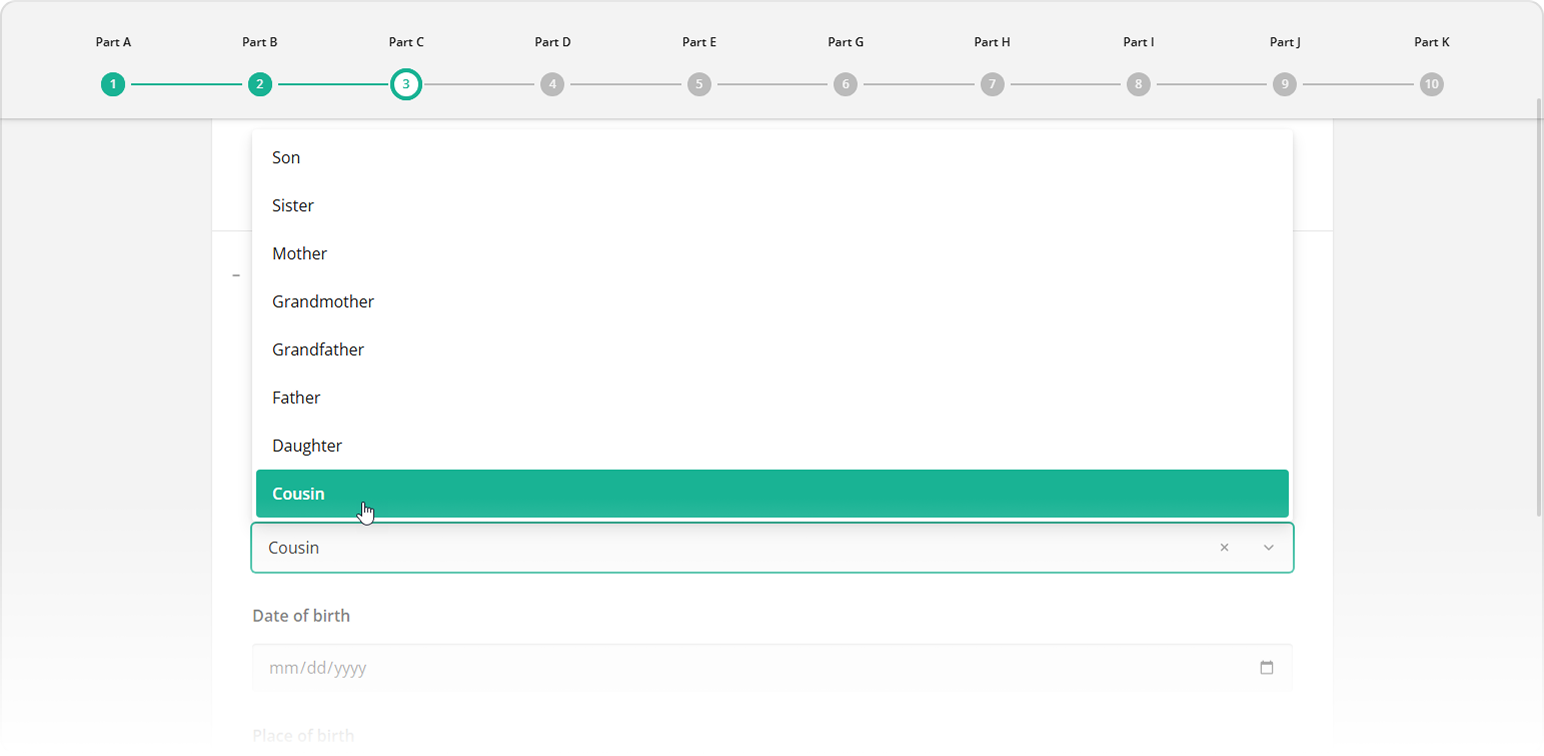
For example, in the image below, the user added a custom option "Cousin" to the list of relationship types. The Choice order is set to Descending, which puts "Cousin" at the bottom.
How to Store Custom Choices
By default, custom values are only stored temporarily—they'll disappear once the browser tab is closed. If you'd like to store them permanently (e.g., save them to your database), you can handle the onCreateCustomChoiceItem event. This event is triggered when a user adds a new custom option. You can use it to send the value to your backend or update your question choices dynamically. To see this in action, check out the interactive demo below:
Manually Add Custom Choices to Dropdown
Conclusion
Without the ability to add a custom value alongside available options in a drop-down list, users may end up selecting an inaccurate option or abandoning the form entirely. With Survey Creator v2.0, you capture more accurate data and create a smoother, more inclusive user experience.